Electric guitar #2
The starting point
 I
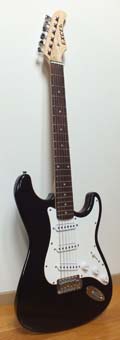
just bought this Excel strat via internet. It's a typical cheap chinese
stratocaster copy, not common here in Finland but more popular in USA
and UK I think. I am pretty sure I'm just second owner because the
guitar came in original box with unused looking gigbag. It looks like
it hasn't been played much (little wear marks on frets) which is no wonder
since this guitar really sucks! It's totally unplayable in this
condition - strings are way too high and intonation is terrible.
I
just bought this Excel strat via internet. It's a typical cheap chinese
stratocaster copy, not common here in Finland but more popular in USA
and UK I think. I am pretty sure I'm just second owner because the
guitar came in original box with unused looking gigbag. It looks like
it hasn't been played much (little wear marks on frets) which is no wonder
since this guitar really sucks! It's totally unplayable in this
condition - strings are way too high and intonation is terrible.
Other problems: sticky stuff on the neck (like some glue residue from
tape?), missing trem bar and strap button, loose jack plate (someone
has over-tightened the screws and they're not holding any more, same
problem with one screw at the back cover). Dirty fretboard.
Positive: body and neck look ok except for one small dent in the neck.
Electrics work nicely and unplugged sound is decent, I didn't find any
dead spots.
This should be a fun project, I'm pretty confident that I can turn this
piece of junk into a quite playable guitar. We'll see how much work it
takes...
Basic fixing
 I
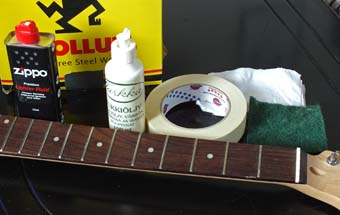
started with the neck. This is the stuff I used: Zippo fluid, steel
wool, gunstock oil (like Tru-Oil), masking tape, pieces of old T-shirt
and "Scotch-Brite".
I
started with the neck. This is the stuff I used: Zippo fluid, steel
wool, gunstock oil (like Tru-Oil), masking tape, pieces of old T-shirt
and "Scotch-Brite".
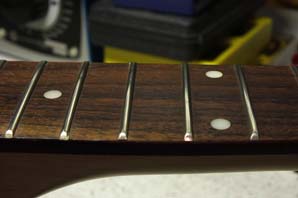
First I covered the edges of fingerboard with tape and rubbed the neck
with scotch-brite. Personally I don't like gloss lacquer finish on
necks, they feel sticky. This treatment gives the neck a satin finish
and it's very easy and safe compared to sandpaper.
Next I covered the whole fingerboard with tape between frets and
polished them with steel wool. 0000 grade would be best I guess, but I
have just 000. That's ok if you are carefull.
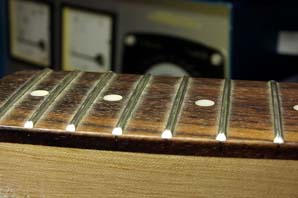
After removing all tape I cleaned the fretboard with zippo-fluid. Then
I applied oil and let it rest for 5-10 minutes before wiping the
fretboard dry. I was extra carefull to dry areas close to the frets to
avoid oil creeping under frets and loosing them over time.
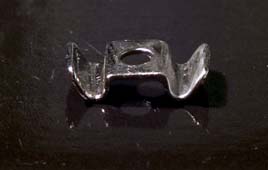
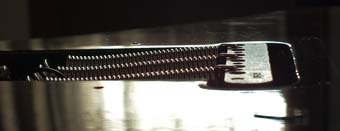
 The
string tree is a basic "butterfly" model and luckily it already had a
spacer. I used fine sandpaper to polish surfaces that are in contact
with strings. You can see the difference in the picture.
The
string tree is a basic "butterfly" model and luckily it already had a
spacer. I used fine sandpaper to polish surfaces that are in contact
with strings. You can see the difference in the picture.
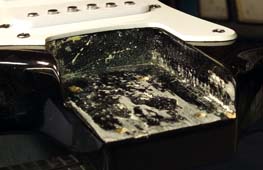
Factory had left the neck pocket very rough. I used a piece of
sandpaper over a small block of wood to smooth it a little to get a
better contact between body and neck.
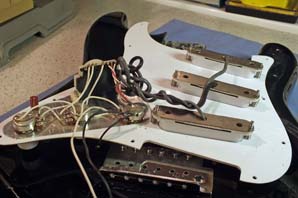
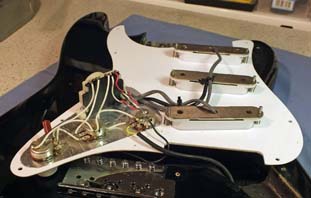
I was not happy with the wiring - factory had not shortened the pickup
wires and shielded wire was not used for output jack connection. After
fixing those problems the wiring looks much neater and it's easier to
attach the pickguard. I also made the "Eric Johnson" mod to tone
controls. Now the upper tone pot works in neck and middle
positions, lower pot in bridge and middle positions.
I solved the loose jackplate problem by replacing the screws with
longer ones. Finally I installed "new" (second hand) strap buttons,
again using longer screws to make sure they'll hold.
Setup
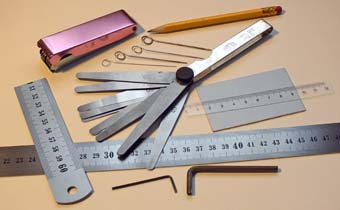 These
are the tools I used (a screwdriver is not in the picture): rulers,
welding tip cleaners, feeler gauge set, hex keys for saddles and truss
rod and a pencil to lubricate nut.
These
are the tools I used (a screwdriver is not in the picture): rulers,
welding tip cleaners, feeler gauge set, hex keys for saddles and truss
rod and a pencil to lubricate nut.
I did the setup in usual order. Truss rod, nut, string height, intonation and pickup height.
There was too much neck relief. I made a small adjustment at time and
left the neck settle down overnight. I had to repeat that 4-5 times but
I was in no hurry. I left just a little bow because that's how I like
it.
Otherwise the setup was very straightforward. The only surprise
(positive one!) was that all frets were nicely in level. I had expected
to do some fretwork.
Now I can actually play this guitar! The bridge is still an issue but
I'll have to wait until I find a fitting trem bar. Now the tremolo is
"blocked" by over-tight springs.
Bridge
I didn't like the original cheapo bridge. Luckily I found a replacement
from internet, a Fender PW-29 with a big block. Second hand but looks
like new after some cleaning and I got it at very reasonable price. It
came without a trem bar but I had one with a fitting thread (metric 5
mm).
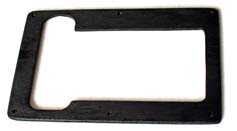
The body of this guitar seems to be thinner than the real thing. The
bottom part of the bridge protrudes from the back a little. I made a
frame from thin plywood to work as a spacer. Using that I was able to
fit the back cover. I set up the bridge as dive-only (not free
floating). That way it's easier to use different tunings.
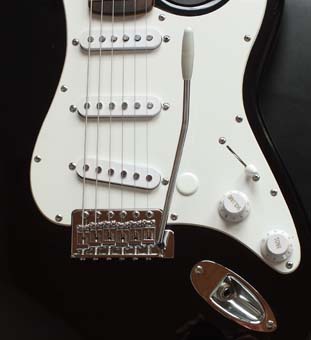
Master volume master tone mod
I just couldn't get used to the awkward placement of the volume pot.
The easy solution was to remove the "upper" tone pot and move the
volume pot there. I can live without two tone controls. I made a
removeable cover from white plastic to hide the extra hole.
(c)Jukka Korppi 2015