How to make a logoplate
 Well,
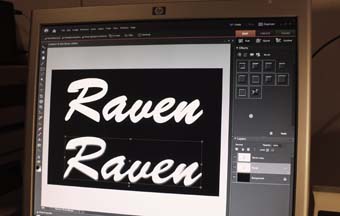
this is one way to do it. Start by making the design on a computer. Use
a picture or scan of an existing logo or design your own from scratch.
Well,
this is one way to do it. Start by making the design on a computer. Use
a picture or scan of an existing logo or design your own from scratch.
Here I applied a bevel function to make the text look more "3-d".
Otherwise the logo would look too flat, like just a piece of paper
(which it actually is, of course!).
This logo will be about 13 cm wide, I wouldn't recommend to make much smaller.
Print the logo using a photo paper.
 This
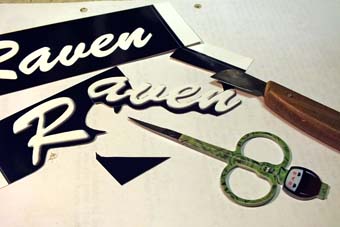
is the tricky part! Cut the logo using a sharp knife and other tools
you have. I think small curved scissors work pretty well.
This
is the tricky part! Cut the logo using a sharp knife and other tools
you have. I think small curved scissors work pretty well.
In this picture you might see the difference between flat and bevelled text a little better.
Prepare the baseplate next. I used thin plywood because it is easier to
work with than plastic or metal. You can find that stuff in model shops.
 Clue the logo on the baseplate. I used a clue stick and let it dry properly under a weight.
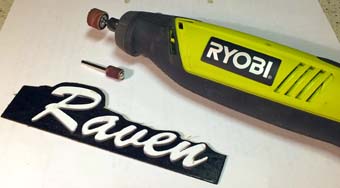
After that I had to trim the plate to follow the curves of the text. I
used a "dremel-tool" (Ryobi, actually) with the bits in the picture.
Remember to leave space for fixing screws!
Before drilling screw holes you might want to measure right spacing for your grille, if you're using one.
Spray a few coats of lacquer on the finished logo for protection and hope that it won't ruin your print!
 And here it is!
I have to confess that this was the first time I did this (and I'm boldly teaching this method like an old pro!).
Anyways, this seems to work. And it really isn't too much work compared to the result.
(c)Jukka Korppi 2015